This program masks (or NULLs) pixels in an input cube.
Requirements
The input cube must be a level 1 or level 2 ISIS cube or mosaic (single or
multiband)
If the MASK option is used, you will need an input cube, either a single band cube or
specify one band of a multiband cube (see Example 1), containing the mask.
There are four ways to use the mask program; and, with all four options, listed below, you
will use the PRESERVE parameter. As the name implies, you will "preserve" pixels either inside
(which is the program default) or outside a given range.
Preserve=inside: means the program will preserve pixels inside the provided range, and pixels
that are not inside the range are nulled.
Preserve=outside: means the program will preserve pixels outside the provided range, and
pixels that are not outside the range are nulled.
Three Ways to Mask:
The input cube can be masked without specifying a mask cube file by using the minimum
and maximum parameters. Pixels outside the specified range are set to NULL. If
preserve=outside is specified, the pixels outside the range are preserved.
You can input a mask cube file. All the corresponding pixels in the input cube are
retained for all valid pixels in the mask cube file. If the minimum and maximum values
are entered also, then the pixels in the masked cube are checked to determine whether
the pixel in the input file should be retained.
You can input a mask cube file in addition to using the minimum and maximum
parameters.
Note that due to the way masking works, an output file will be created regardless of whether
or not the mask was applied to the corresponding input. To determine the degree to which an
input cube was masked, look for the "PixelsMasked" group in print.prt . If no pixels were
masked, there will be a comment present which reads "No pixels were masked in this image".
Modified schema location from astogeology... to isis.astrogeology..."
Stuart Sides
2003-07-29
Modified filename parameters to be cube parameters where necessary
Sharmila Prasad
2009-08-24
Set Internal Default for "MASK" to be "FROM"
Steven Lambright
2010-10-13
Removed printf and now respecting cube attributes set on input cube
Kimberly Oyama
2014-03-03
Made default MASK parameter work when FROM cube has multiple bands. Updated Documentation.
Added examples. Fixes #1871.
Andrew Stebenne
2015-03-22
Specify that an output cube will be created whether or not the mask was applied. Add an output
group to print.prt to indicate how many pixels were masked in the output image. Implements
recommendation #898.
Use this parameter to select the filename to be used as the mask. If you enter a
multiband cube you must specify the band. If this parameter is not explicitly entered,
each band of the FROM cube will be used as its own mask.
This parameter indicates whether the pixels chosen to mask are within the range given
or outside the range given. If INSIDE, pixels inside of given range will be preserved,
and if OUTSIDE, pixels outside the range will be masked.
Type
string
Default
INSIDE
Option List:
Option
Brief
Description
INSIDE
Preserve inside range
If the mask pixel is inside the given range (indicated with the MINIUMUM
and MAXIMUM parameters), the input pixel will be preserved in the output
cube, otherwise it will be NULLed.
OUTSIDE
Preserve outside range
If the mask pixel is outside the given range (indicated with the MINIMUM
and MAXIMUM parameters), the input pixel will be preserved in the output
file, otherwise it will be NULLed.
This indicates which special pixel values are to be included as valid pixels in the mask.
For example, a NULL in the mask cube will cause the output to be NULL if the NULL or ALL
option is selected. If NONE is selected, then the input pixel will be propagated to
the output cube.
Type
string
Default
NULL
Option List:
Option
Brief
Description
NONE
None
No special pixels are considered valid in the mask.
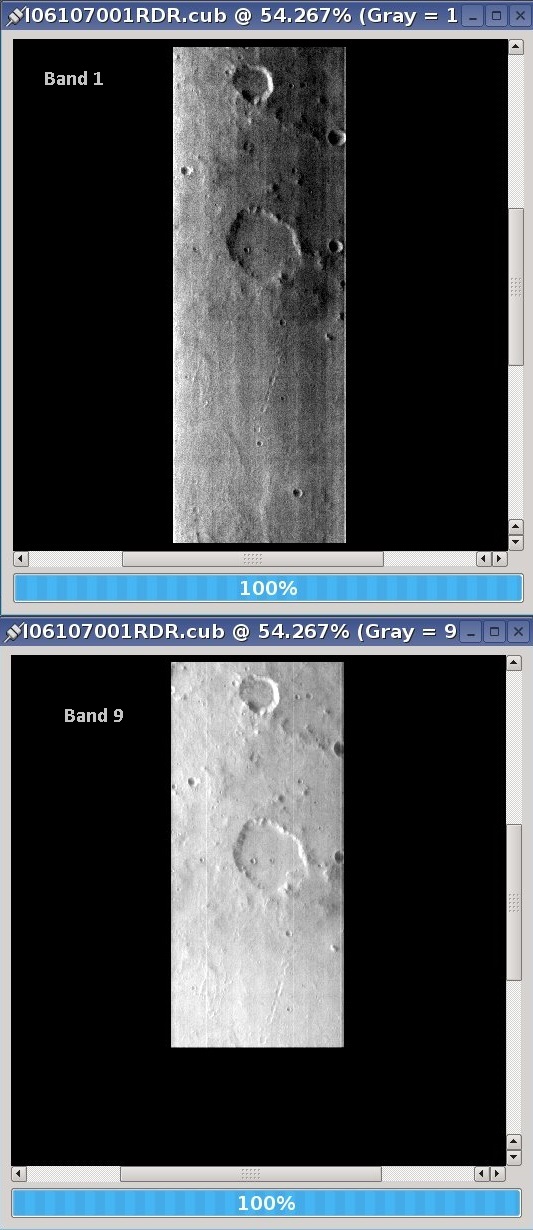
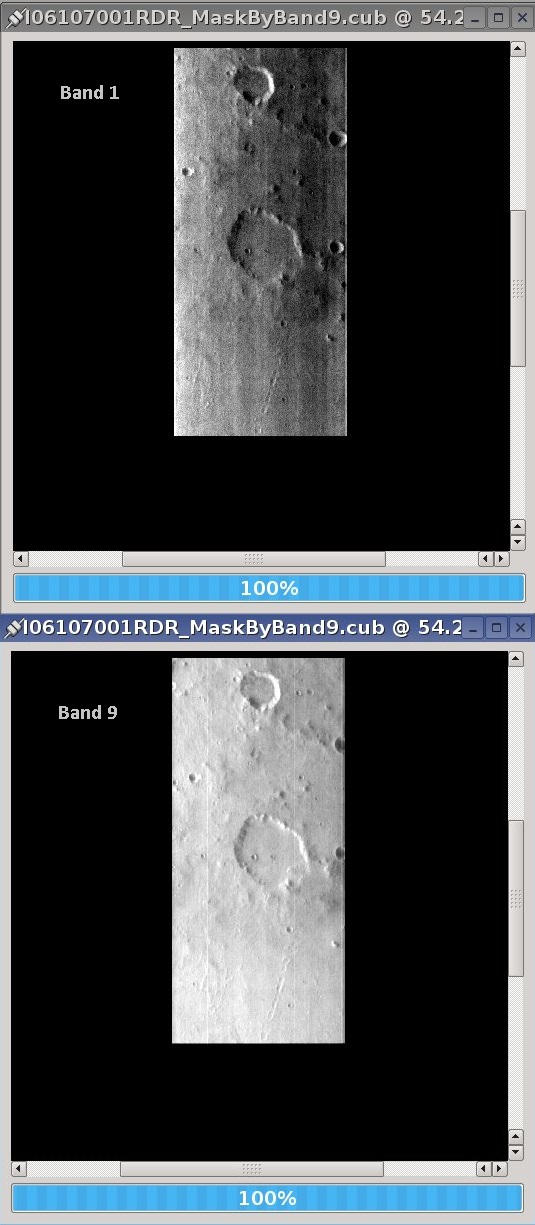
An example of using a single band from the input cube as a mask.
Description
This is an example of a mask that is comprised of one band of the multiband input cube.
It shows how the larger band (band 1) is cropped when the smaller band (band 9) is used
as the mask. Note the +9 at the end of the file name specifies a single band.
An example of how to run this program from the command line.
GUI Screenshot
Example of GUI command
Example GUI
An example of how to run this program using the GUI.
Input Image
Input image
Input image for mask
Parameter Name:
FROM
This is the input image for the mask example.
Output Image
Output image showing results of the mask application.
Output image for mask
Parameter Name:
TO
This is the output image that results. You can see that band 1 has been cropped to the
same length as band 9.
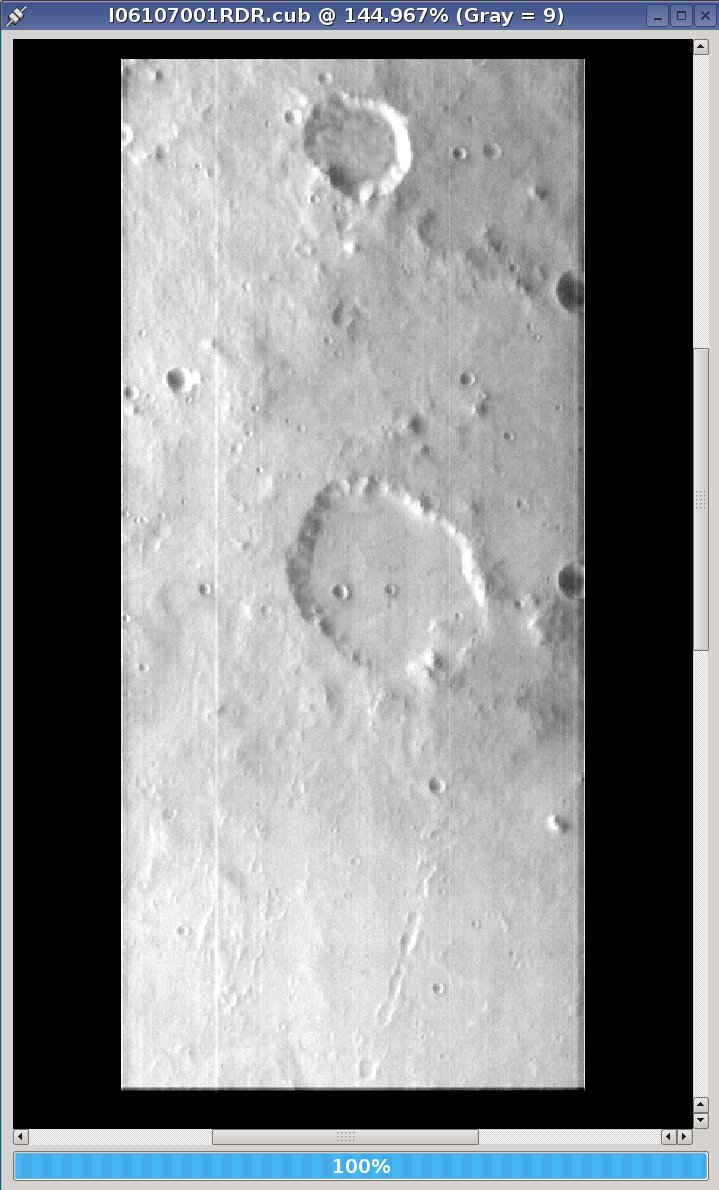
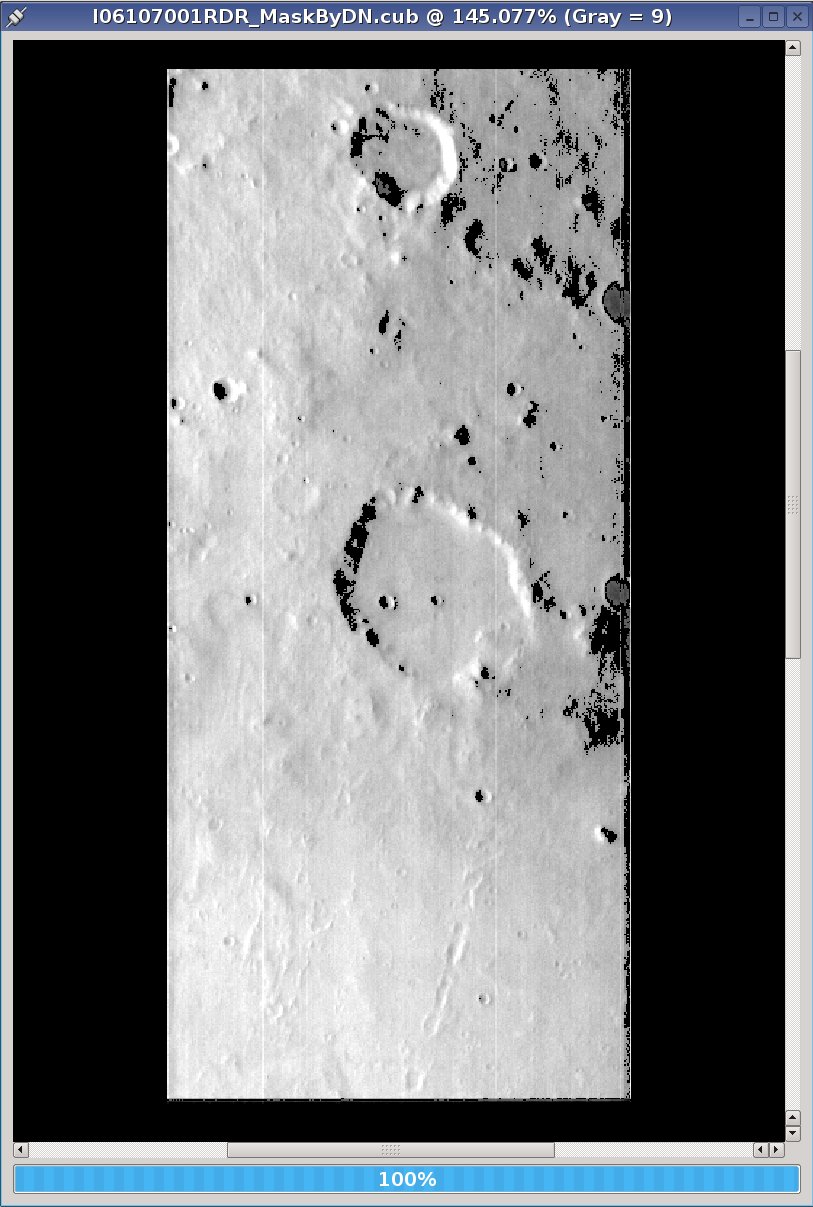
Example 2
An example of not specifying a mask.
Description
This example does not specify a mask. Each band of the input cube will be used as its own
mask. The effect is the specified DNs are stenciled out using the minimum and maximum
values.